
I liked how strong it looks despite only being line drawings.
Next we repeated the process except with ink, using a piece of card to apply it. This forced us to work more expressively as the card would start to deteriorate, meaning that we couldn't get as much of a defined line anymore. I liked working this way as you could work quickly, but because it was so expressive the images still resembled the object.

I liked that shading could be used as well to express the material of the object and to add extra definition and depth. The whole duration and level of ink was used, from dark, solid ink to light scratches, just before it ran out completely, to give different effects and I tried as many different techniques as I could to see how it affected the look of the object or how it was interpreted.
The process was repeated again but with a different object.

Finally we were given 5 minutes to do as many drawings as we could, which again forced you to work expressively and gave a nice, rough look to the drawings as different levels of ink and sections of the card were used. I loved that the card could be swept over the page to get instant shapes - it really was a quick, but effective process.

I enjoyed trying to convey form through these drawings and how while the emphasis was on depicting the shape of the object, it was more of just capturing the sense of it that was important, rather than technical detail.
For the rest of the day we looked at developing a shape from these drawings out of paper, which would force us to simplify the shape continually until we could represent it in paper or it changed into a shape that looked good in a 3D form.
I chose to focus on the flat rolled shape from the first drawing as it initially seemed like it would be quite easy to make out of paper as it was simple already.
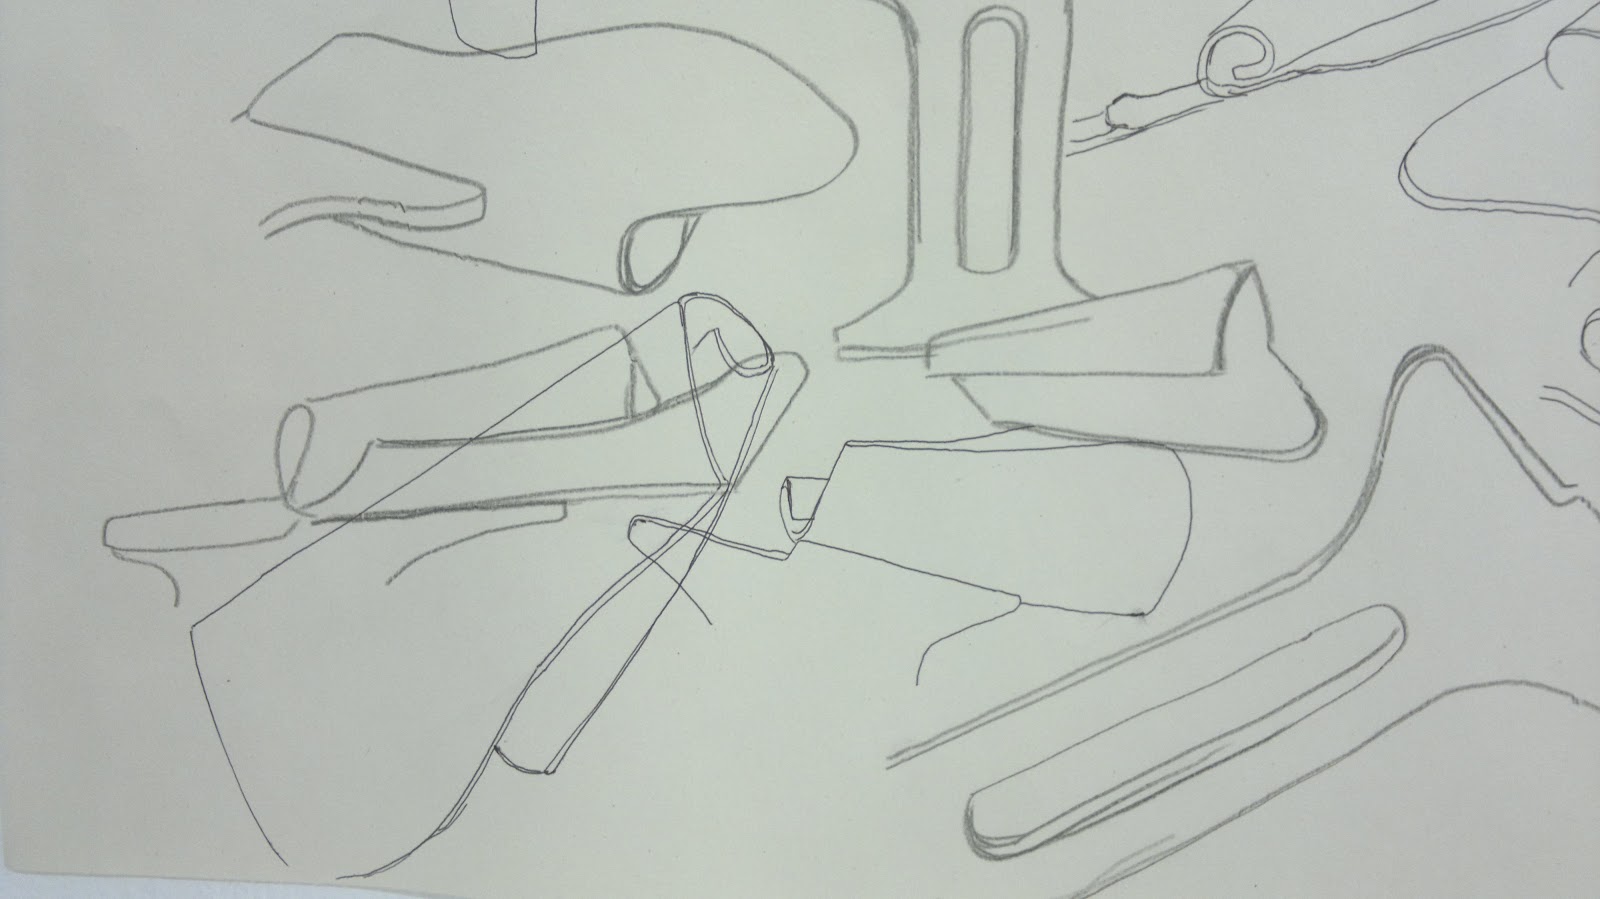 |
| Close up of the shape I focused on |
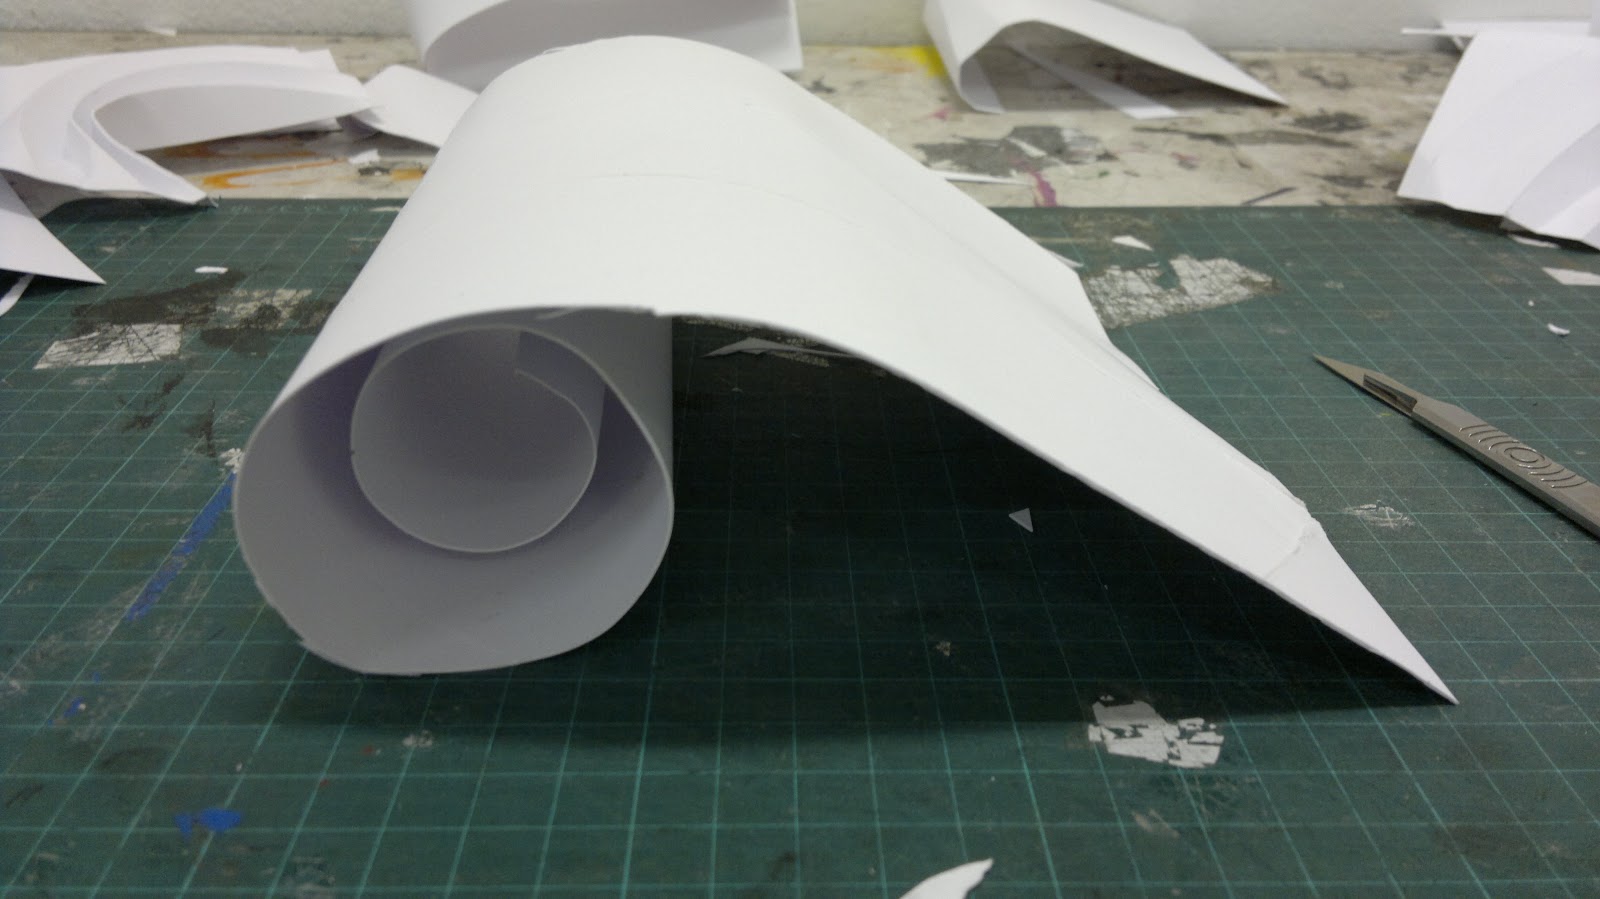
Below are photos of the paper models, showing the development of them.


None of the shapes were holding particularly well, so I tried a locking technique of cutting a slot in one section and then cutting a rectangle out of the opposite piece to feed through.


While this held the shape for a short amount of time, it looked too messy. So I carried on creating shapes and found this one.

It had the same use of the circle and overarching shape as the original shape, but it looked more fluid. The only problem though was that it had to be held together to form this shape, as all it was was a rectangle with a circular curve scored into it. I tried it out in a larger scale to see how it would look as well as to try another locking technique.


I tried an arrow locking method, which meant just cutting one corner into an arrow shape and a slot in the other corner. It was easy to make and it held the shape really well. The larger model showed the form better as well, showing how interesting the back is now as well as the front.
On the final day we focused on creating two final outcomes in a group, which would be 3D models made out of paper and plastic. They had to come from our shapes that we had made previously, but be interesting to look at and have a purpose, as well as actually be possible in plastic, which meant thinking about the shape in a net form. I worked in a group with George and Libby, but George hadn't been here to make any shapes out of paper, so we concentrated on mine and Libby's shape. We thought about including aspects of the object that George had looked at though, which was a cog, if possible later. Looking at the paper models, we found that both had a similar organic curve, so we started by making a lot of these shapes in the same way that I had made my model before: of using a rectangle and circular curve, except this time joining them together a bit looser so that they had more of an arc. After making several George started to combine them to form a mass. As we'd made ones of different scales he could fit them together and the main shape was changed to curve around at the top to allow another model to be added and to make a smooth shape. We really wanted to go for an organic fluid shape, where the lines would flow smoothly into each other and this initially meant using a lot of staples and masking tape to fix it into place, but I think it looks great.
 |
| In development when the top curve wasn't fixed down yet |
 |


After this we had to think about how it would work on the laser cutter, which requires the item to be flat and fit the dimensions 40cm x 30cm. This meant that we'd have to scale down the shape and so we measured the shape, which was made from only 3 rectangular pieces and set new measurements for it. To make sure that it would work on this scale we made the new size of model, which was quite difficult. We wanted the same fluid look to it, but this was harder on a smaller model and trying to attach staples in such small areas was nearly impossible, but we kept persisting with it to make sure that it would work in plastic.
 |
| Smaller scale model (with added masking tape) |
After we had made the smaller model it was suggested that we cut a design into the shape to make it more unique to our group. We returned to thinking about the cog and of creating a contrast between the straight lines of that with our organic shape. George thought of the almost window pane design below.

We were going to go with design, but then George designed another.

This seemed to include the contrast, but in a much more subtle way by mixing the curves and straight lines in together. Plus as less was to be cut out, it left the shape more structurally secure. We decided to not add this to the paper model as it would mean taking it apart, which would be difficult with the amount of masking tape and staples on it.
Next we needed to create the net of the shape on Adobe Illustrator so that the laser cutter could follow this design. As we'd practiced using it the previous day and learnt about vector paths, this wasn't too hard to do, but it was sometimes frustrating as we tried to get the right shapes and scale.

This design was then given to the laser cutter and it etched the design onto the piece of plastic, ready for us to go around with a scalpel knife.

After the pieces were cut out we molded it into the whole shape, using staples sparingly to hold it together and making a slot in the right place for the arrow lock to go through. This was a lot easier than I thought it would be as I had imagined the plastic to be difficult to work with and it bending out of shape, but as it was thin this wasn't the case. However after we'd attached the small and large shapes together we found that this formed an interesting enough shape on it's own. It was fully fluid with out the inclusion of the other shape with the design on and while we liked the designed shape, we thought that it would distract too much from the simplicity and flow of the main shape. So we decided to leave them separate, which I think improves the design. Plus the shape with the design is interesting enough to stand on it's own.
Final Plastic Outcome


I'm really impressed with how the final outcomes turned out, especially the plastic shape as it maintains it's fluid, smooth shape and it looks quite professional in this material. In the end we thought that the shape would work best as a lampshade because the arcs in the shape would manipulate the light in interesting ways and intensities. The process was quite slow because of the amount of problem solving that we had to do to make the shape work in both materials, but because we did this much planning it meant that both shapes look similar and it all seemed worth it for the final outcomes.
As our group had some spare time while we were waiting for the laser cutter I started to experiment with the paper models again to see how it might have looked if we had included the cog shape earlier. This involved including more straight lines and raised box shapes in the organic shape, but these didn't work particularly well as the curve of the shape pushed the straight lines out so you could barely see them. They were just tests, but they cemented that we'd chosen the right shapes to focus on.


The photo above shows a test where I looked at what would have happened if we'd had gone for the window pane design. I think we made the right choice as this looks too weak because of the amount cut out of the shape.
Overall, I found 3D design useful as we learnt skills that I can use in other areas like perspective drawings and looking at an object from every angle. The problem solving aspect of the area was quite enjoyable as well, but some of the work just lacked energy for me and felt a bit soulless. It seemed almost too concerned with being technical and you didn't have the chance to include any personal expression. With the final outcome I missed working expressively, but it was still interesting to see the development process from inspiration to final outcome and purpose as well as to see how beneficial planning and determination with an idea can be.
No comments:
Post a Comment